


EnvisionTEC Keeps Tenco Proto On Track
If imitation is the highest form of flattery and competition breeds creativity, then Tom Castermans’ latest 3D printing project is an homage to innovation.
When Tom Castermans saw a project involving 3D Printing and Formula 1 race cars, he was automatically interested. A team from Cideas Inc., took a 1927 model Miller 91 race car and printed it at a quarter of the scale. Tom was inspired — he decided to do one better than the Cideas team — a Miller 91 racecar at 1/43rd of the size built by a 3D printer. His machine of choice to complete the project? An EnvisionTEC Perfactory® Aureus.
Tom owns both Aureus and ULTRA® machines but chose to complete his project on the first printer due to its capacity for small details.
“Building large models is quite easy, in my opinion,” said Tom. “If I want to do differently than Cideas, I need to go micro.”


Renderings of the Miller
91 from Gould Studios
Tom ordered the STL file for the race car from catalog supply company TurboSquid. He chose HTM140 as his material and began first with the Miller’s wheels. In the size comparison below, the HTM140 wheels are smaller than a 20 cent euro.

Miller 91 wheels and chassis parts
Initially, at 1/43rd of the original size, the Miller’s spokes were only 0.1mm thick after scaling them down, but Tom decided to see how they came out. Some of the spokes printed correctly, but most were broken. For the second build, Tom decided to increase the spoke thickness to 0.3mm in diameter. That seemed to work, but due to the positioning, the wheels had build lines. He sent the file to the 3D printer again, but in 15 microns. This third build was a success.

Painted wheels without tires

HTM 140 wheels with thickness added to the spokes


The split body of the Miller 91
The engine, tires, and seat were more straightforward and required less remakes. Gould Studios modified the car body and chassis for Castermans. Thickness was added to the body panels to allow the part to print more easily at a thickness of 0.7 mm. Meanwhile the production company also modified the chassis.
The body was split into pieces to print, as were the front radiation, the engine hood and the driver compartment. Castermans noted that this move reduced build times. Ultimately, the driver compartment and the engine hood were put back together.
Without changing any details of the design, Gould made it easier to be built by attaching levers and other supports. With these modifications, Castermans split the chassis into two halves to print.

Half of the chassis with supports
A rod runs through the chassis, but at only 0.5 mm thickness, this rod caused the build to fail. This iteration also was difficult to remove from the build platform. Castermans decided to place the chassis upright, and split the piece again in two — but instead of a left and right part, he divided it into the front and rear. That was a stable solution.

The chassis is arranged upright

Successful iterations of the chassis
The radiator grill (pictured below) had parts so thin that Castermans had to reduce them by half and double their thickness. This required a good deal of work in Magics, but the very first print turned out well. Castermans said that the horizontal radiator ‘strings’ are so thin that after he post-processed them in IPA, they stuck together and he needed to separate them again with a scalpel. The radiator grill was then painted in chrome and set aside.

Size comparison of the radiator
All of the parts needed painting and finishing. The logos on the tires were tampon printed. The tires themselves were finished with a soft-touch coating to make them look and feel like rubber.


The finished wheels
The gauges in the dashboard were painted in aluminum and the body was painted to match the real Miller 91. Finally, all the decals and stickers for the Miller 91’s body are dry transfers.

The HTM 140 parts fit together at a fraction of the original size


The halves of the body are put together, primed, and painted
Castermans currently 3D prints parts for a French miniature car manufacturer. He hopes to use his EnvisionTEC printer to print more masters now that his Miller 91 project has proven so successful. For a new project, he believes that he will print radiator grills for a model car kit. It will be the first model car kit that includes 3D printed parts in a serial production kit.

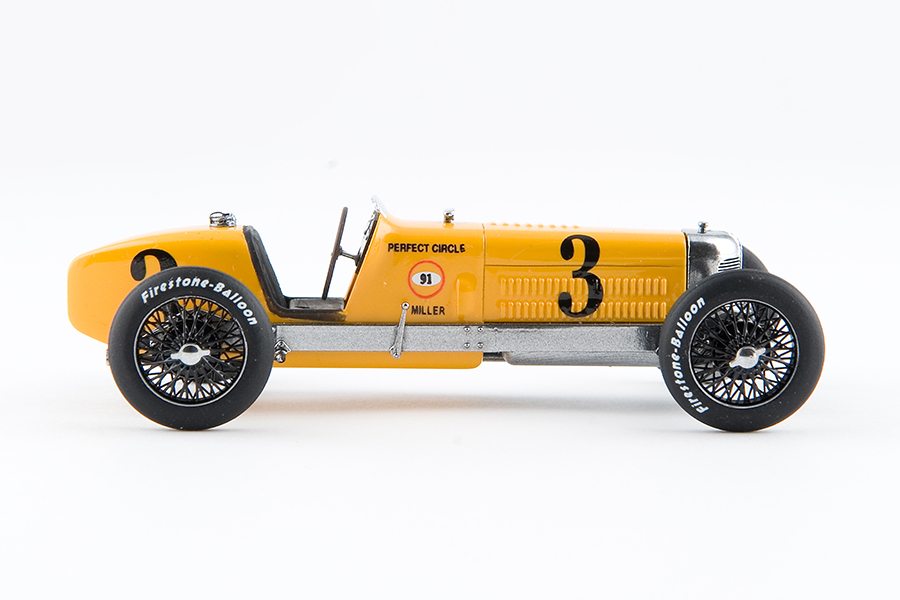
The finished Miller 91, 1/43rd the size of the original vehicle
Tom finished his project for the RapidPro 2014 industrial show taking place in Veldhoven, the Netherlands.